welcome


Welcome in my special space - get yourself a cuppa and stay for a while!!
Please leave a comment, that way I get to know you too...

Thursday, 29 September 2011

visit REDHEART.COM - free patterns


ShopBlogLearnBooksYarnFree Patterns
ShopRedHeart.com
Princesses & Heroes BookCrochet Along

lace candles DIY


Camilla at Family Chic says her DIY black lace candles are the perfect touch for Halloween. ...divine!


Crochet Hearts from http://haak-en-stekie.blogspot.com/


My small changes to Julie Khundi's tiny crochet hearts, in blue.

Make a magic ring.
R1: Ch 1, SC into loop x7, pull loop closed, join with Sl to Ch1
R2: Sl into 1st st, 5HDC into 2nd st, 1 DC in next 2 st, 1 HDC ch 1 HDC in bottom st, 1 DC in next two st, 5 HDC into next st, Sl in original st.
Give the tail and bottom a little tug to help shape, tie knots and weave ends.

My small changes to  Julia Crossland's tiny hearts Teeny Tiny Crochet Heart Bunting

R1: Make a ch with 4 st and join.  SC 10x into the middle of the ring.
R2: Make 5 DC into the 1st st.  Make
1 SC into each of the next 3 st. Make 1 TR*, again 1 SC into the next 3 st, and 5 DC. There should be 1 st space left, SL into this.
R3: Join the 2nd colour. Make 1 ch into the last SL of the previous round.  1 SC into the next st. 2 SC into each of the next 3 st. 1 SC into each of the next 4 st.
1 SC 1 HDC 1 SC or 1 SC 1 DC 1 SC  into the following stitch (this is the tip of the heart), 1 SC into the next 4 st, 2 SC into each of the next 3 st, 1 SC into the next, SL and tie with a knot.


door to country hat rack do over visit Renee at Sweethome


cupboard.jpg
Recycle an unwanted cupboard door by turning it into a country hat rack. 
Such an easy how-to by Renee at Sweethome
and yet it can make such an impact on any entryway needing a makeover.

as requested a bit about quilting....allcrafts@aweber.com


New Projects

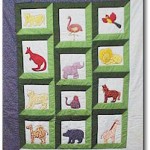
Day at the Zoo Baby Quilt

Zoo Baby QuiltLions and elephants and flamingos – oh my! Sew the entire zoo in this adorable Day at the Zoo Baby Quilt! Each square is stitched individually so it’s a great take-along project for hand applique. Though if you need a gift for baby shower say, in a week or so, then machine applique is the way to go! Added to Quilting Patterns and Baby Crafts

Do you love clocks...visit http://recoveringcrafthoarder.blogspot.com/


Posted: 26 Sep 2011 04:00 AM PDT
A couple years ago, I made a clock from a book.


I need a clock in my master bedroom.  I've got nothing.  So, I've decided to check out Pinterest and find some inspiration.  FYI, click on the picture to go to it's Pinterest Page.

Clocks!


Okay, I seriously am going to explore my home and see what I can turn into a clock. 
Other people's creativity really does inspire me!


a few great links to share with you today

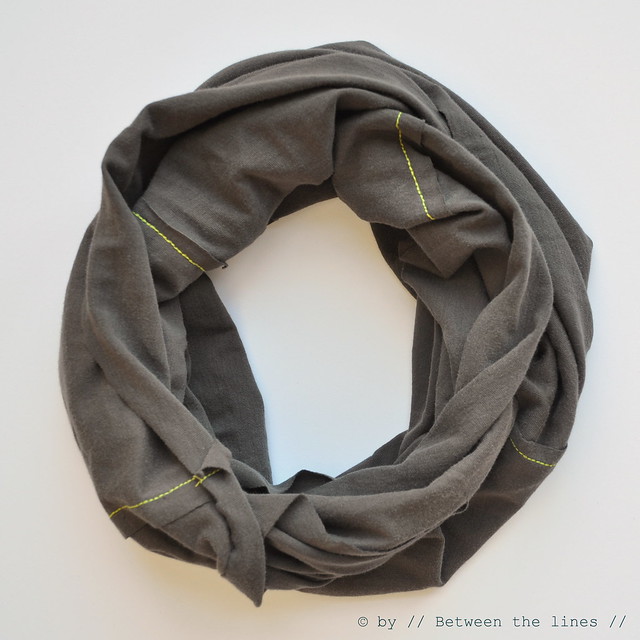
a summer scarf find from http://pm-betweenthelines.blogspot.com/


Posted: 26 Sep 2011 05:38 AM PDT
 DSC_0699

School has just started - about what? three weeks ago - and we all went through our first colds and/ or first sore throats. The weather has been up and down, lately - more up than down, to be honest - but the mornings are definitely cooler. Not cool enough for digging up our woolen scarves - but a light scarf might be welcome, I thought. And since I still have a couple of K.'s favorite but worn out (according to me, not to him) T-shirts left and a couple of stitches on my machine which I haven't tried yet, I thought a homemade, light weight infinity scarf might be worth a try! And that's exactly what I did.
I didn't chrono but this is an under half an hour project for sure (rummaging through your closet for a t-shirt not included) and it couldn't be easier. So here's a quick how-to for a simple yet fun infinity scarf!

What's needed:
- an old t-shirt (a sweater might do as well)
- scissors
- pins
- thread in contrasting color (I used a contrasting yellowish green thread to offset the brownish/grey faded color of the T-shirt.
- sewing machine or needle


infinity scarf

Instructions

1. Lay down your T-shirt on a flat surface and cut off the bottom hem part. Snip-Snip. (pic.2) Do the same at the sleeve insert level, cutting from one side to the other (pic.3)
2. Fold in half and cut again along the fold - snip snip - to obtain two identically sized tunnels. (pic.4)
3. Cut away the side seams (4 times) - snip-snip - to obtain 4 identically sized rectangles. (pic.5.)
4. Lay one rectangle on top of another rectangle, right sides facing up, and with a 1/2 inch overlap. Pin together - pins-pins (which happens to be the palindrome of snip snip, by the way, how cute is that!). Repeat for the remaining pieces and close the circle by placing the first rectangle on top of the last one (pic.6).
5. Sew together by hand or on your sewing machine with a jersey stitch. And done!

You have now obtained a wonderful light weight infinity scarf and no cost. So, now you can start experimenting with it - wear it twisted around your neck a couple of times, or just once and knotted... You probably could wear it as a head band as well... or as why not, as a belt (as a maternity belt even). A versatile addition to your wardrobe, that is!

Sunday, 25 September 2011

dip dyed...how to share


How-To

Dip-Dyed T-Shirt

35K
0
More chic than a tie-dye but just as fun to make, 

How to Dip-Dye with Fabric Dye

We used Rit liquid dyes in Denim and Navy (ritdye.com). You can combine colors for custom shades. This technique can be adapted for unfinished wooden items and bamboo blinds (let them dry on paper towels), and paper (let the dye solution cool before dipping paper).

Tools and Materials

Sheer jersey long-sleeve T-shirt, in White, from americanapparel.net
Large plastic storage bin or galvanized-steel bin
Stir stick
All-purpose liquid dye
Sample fabric or paper towel
Sewing pins
Synthrapol detergent (optional)

http://www.marthastewart.com/268698/dip-dyed-t-shirt?xsc=eml-