http://craftykitty.wordpress.com/tag/free-pattern/
Greta’s Blankie – free pattern
7FEB
Many people asked me if I could direct them to the pattern I had used for my first attempt at a baby blanket… remember?
So here I am trying to write my very first pattern  As the stitches, yarn, hook and sizes were determined only by my inspiration at the moment, this is not going to be a step-by-step tutorial, but rather a serie of directions, in order for you to be able to get something similar
So… ready for GRETA’S BLANKIE?
YARN:
Since it’s a baby blanket, I figured that using some acrylic yarn would be better. Small babys tend to get messy and acylic can be washed in the washingmachine without too many concerns. Wool yarn looks better though, and I prefer it due to the fact that acrylic tends to be a bit too “shiny” for my taste. So, according to your needs and your preferences, feel free to use what you like best 
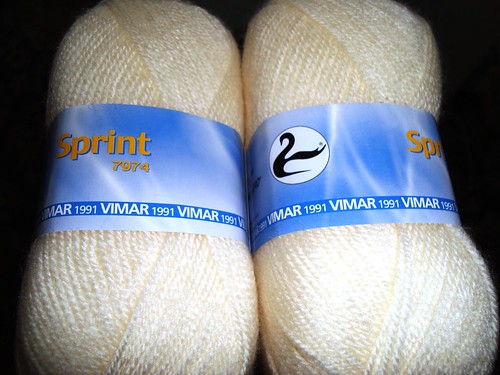
I used Cigno Nero Sprint yarn, an Italian brand. It’s 100% acrylic and it’s veeeeery soft to the touch. The label says it should be worked with a 3-4 (G) Hook. I ended ups using about 4 skeins.
HOOK:
I wanted my blanket to be soft yet crispy. I tried the advised hooks and I didn’t like the result with the stitch I had picked (more about it later), so I kept increasing the size until it looked the way I had it in my head. I ended up using a size 6.0 (J) hook in the end!
I wanted my blanket to be soft yet crispy. I tried the advised hooks and I didn’t like the result with the stitch I had picked (more about it later), so I kept increasing the size until it looked the way I had it in my head. I ended up using a size 6.0 (J) hook in the end!
GRETA’S STITCH:
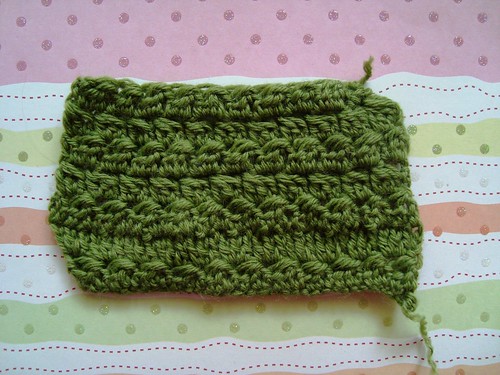
I was looking through an old craft book my gradmother had given me, when I found something very similar to this cool checkered pattern (the lower one) and I wanted to try it out. Still, for some odd reason I am totally unable to follow directions in italian (which is my mothertongue!), so I failed so sublimely that I ended up with a new stitch
I was looking through an old craft book my gradmother had given me, when I found something very similar to this cool checkered pattern (the lower one) and I wanted to try it out. Still, for some odd reason I am totally unable to follow directions in italian (which is my mothertongue!), so I failed so sublimely that I ended up with a new stitch
This stitch (*GS*) is worked in *clusters* of 3 dc.
All the dc will have to be worked as follows: *yo, insert hook in indicated chain, yo and pull up a loop – 3 loops on hook, yarn over and draw through 2 of the loops – 2 loops on hook, 1 dc in next chain (3 loops on hook), 1 dc into next chain (4 loops on hook), yarn over, draw the yarn through the 4 loops, chain one* – stitch cluster done
PATTERN:
1. BASE: chain a multiple of 3 (+ 3 chains to turn). Pick the lenght that better suits you. My blanket was a size 50cmx70cm.
2. ROW ONE (right side): 1st dc of *GS* in 3rd chain from hook, continue with *GS* clusters till the end, chain 3, turn
3. ROW TWO (wrong side): repeat Greta’s stitch as above, working the 3 dc in the *stitch cluster* of the previous row instead that on single stitches, ch 3, turn
4. ROW THREE to…: repeat ROW TWO till desired lenght size.
EDGING:
there are so many different ways to edge a baby blanket. I just added a collection of my fave stitches.
1. FIRST ROW: 3dc, 2ch, repeat all around. The 2 ch spaces will allow you to add a ribbon.
2. SECOND ROW: *st in the 2ch spaces of the previous round, ch 3*, repeat all around.
3. THIRD ROW: *1 sc, 1 hdc, 3dc, 1 hdc, 1 sc* in each ch 3 space of the previous round, repeat all around. The “petals” are finished.
You can add other rows if you wish…
And last but not least…
FLOWERS:
this is actually a “traditional” pattern. I have seen it in many variations in books and on websites. The correct name should be Irish rose. Have fun googling for the many possibilities!
So… this is pretty much it. If anyone has ideas, tips or comments, please let me know. It’s the first time that I write a pattern down and english is not mym othertongue, so I would really appreciate any hints 
And if anyone happens to give this pattern a try, please comment with links to your pics! I’d LOVE to see the results!


No comments:
Post a Comment